This resource provides concrete, tactile work with land and water forms, island formation, and map labeling, making it an ideal end of the year hands on assessment for lower elementary students. Whether you need a follow up for land and water forms or a bridge between the First Great Lesson and independent mapmaking, this build an island activity gives children the component skills they need before designing their own island from scratch.
Islands Didn’t Appear Out of Nowhere: Hands-On Geography for Curious Kids
Here is a fact that stops most six-year-olds in their tracks.
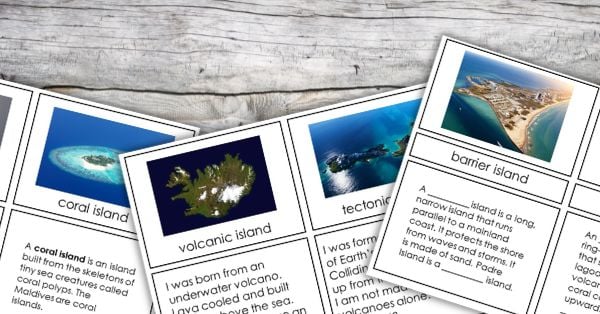
The island of Surtsey off the coast of Iceland did not exist in 1963. Then a volcano erupted under the ocean. Within four years, a brand new island rose from the sea. No one drew it first. No one built it. The Earth made it.
Here is another fact. The Hawaiian islands are moving. Not floating. Moving. The Pacific tectonic plate slides northwest at about the speed your fingernails grow. Each island formed over the same volcanic hotspot. Then the plate moved. The volcano went with it. A new island began forming. That is why the oldest islands are northwest and the only active volcano is in the southeast.
Here is a third fact. The largest island on Earth is Greenland. It is three times the size of Texas. And most people have never seen it on a map drawn accurately because most world maps distort the size of landmasses near the poles.
Islands are not random. They have origins. They have rules.
What the Great Lesson Says About Islands
In the Montessori First Great Lesson, the Earth begins as a ball of molten rock. It cools. The crust hardens. Water vapor condenses into oceans. And the land that rises above that water is the beginning of every island and continent on Earth.
Some islands formed because the Earth’s crust cracked and lava pushed up. Iceland is still forming this way today.
Some islands formed because coral grew on underwater volcanoes. The Maldives are coral islands. The volcano sank. The coral kept growing. The island stayed.
Some islands formed because sea levels rose and flooded low-lying areas, leaving higher ground surrounded by water. The British Isles were once attached to mainland Europe.
When a child understands island formation, they are not memorizing vocabulary. They are reading the geological history of the planet.
What Is the Imaginary Island Lesson?
The Imaginary Island lesson is a classic lower elementary geography presentation. The child designs and draws a complete island from scratch on blank paper. They add mountain ranges, rivers, lakes, bays, peninsulas, and sometimes human structures like roads or bridges. They create a legend and a map key. They name their island.
It is a demanding task because nothing is pre-drawn. The child must remember every geographical feature and place it logically. Rivers must flow from mountains to the sea. Lakes must sit in low areas. Bays must cut into the land. The child must also create a consistent set of symbols for their legend.
Sometimes children are not ready to go directly from the land and water forms tray to the Imaginary Island lesson. They need a bridge. They need to build someone else’s island before they design their own. That is exactly what this Build an Island printable provides.
Fun Hands-On Activities for Learning About Islands and Land Forms
Before a child draws their own imaginary island, they need to touch, build, and move things. Here are three hands-on activities that work.
Activity 1: The Sponge Island
Take a natural sea sponge. Place it in a shallow dish of water. The sponge absorbs water and sits partly submerged. That is an island. Squeeze the sponge slightly. Water rises. The island gets smaller. That is rising sea levels. Lift the sponge completely out. That is an island that has grown due to volcanic buildup or tectonic uplift. Children can manipulate the sponge for ten minutes and understand more about islands than some textbooks explain in a chapter.
Activity 2: Baking Soda Volcano Island
Fill a small bowl with sand or kinetic sand. Shape it like a volcanic island. Push a small cup into the center. Add baking soda. Pour in vinegar colored with red food coloring. The “lava” flows down the sides of the island and into the surrounding “ocean.” The child sees exactly how volcanic islands like Surtsey or Hawaii formed. Repeat three times. Watch the island grow slightly larger each time as lava cools and hardens.
Activity 3: The Flooded Tray
Build a clay landscape on a tray. Include a tall mountain, a low hill, and a flat plain. Pour water slowly into one corner of the tray. Watch as the low areas become lakes. Watch as the highest peaks become islands. Children see in real time how sea level determines what is an island and what is part of the mainland.
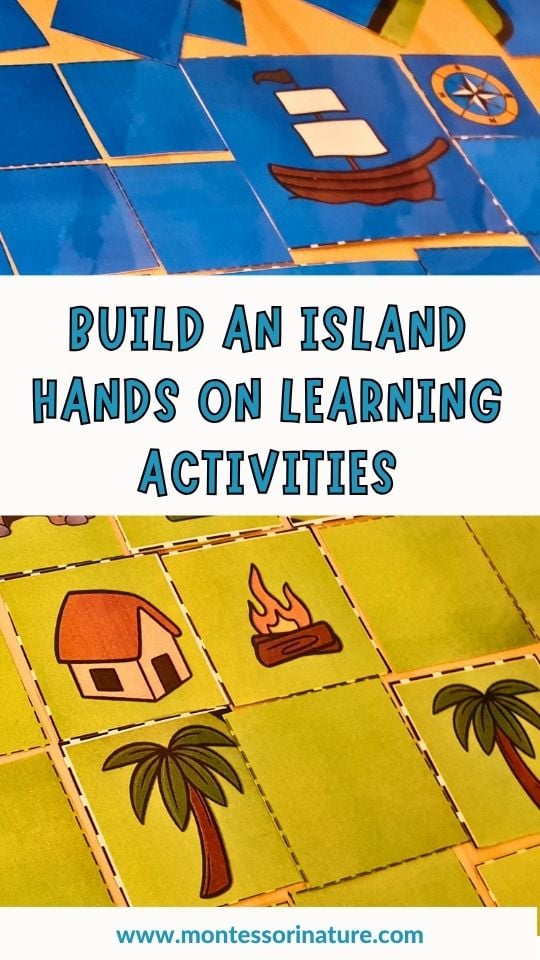
The Build an Island Printable: A Direct Bridge to Imaginary Island
After children understand how islands form, they need to handle a pre-made island before they design their own. This Build an Island printable is designed specifically to introduce the Imaginary Island lesson in a low-pressure, hands-on way.
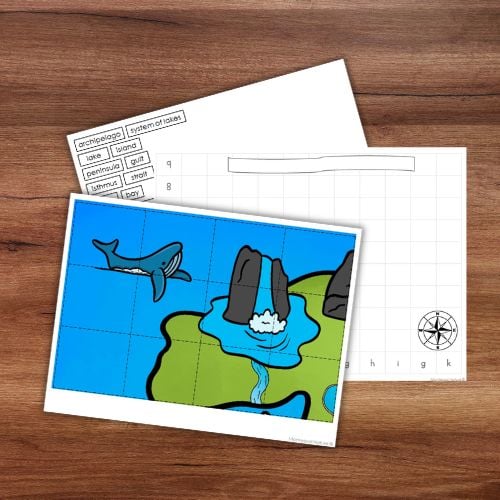
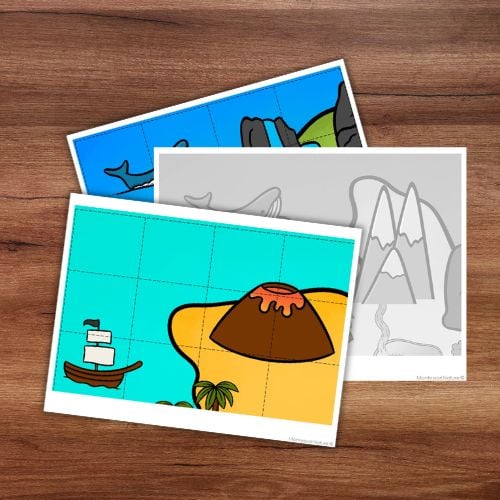
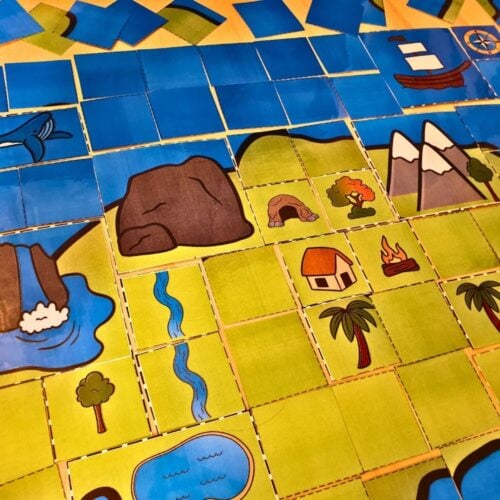
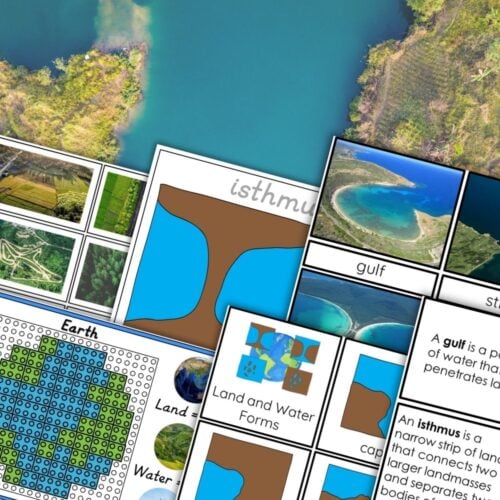
The printable gives children a large color puzzle. They match puzzle pieces to a black-and-white control sheet. The island takes shape piece by piece. After building, they place labels on the bay, peninsula, lake, and island. Then they draw their own island on graph paper and create a legend.
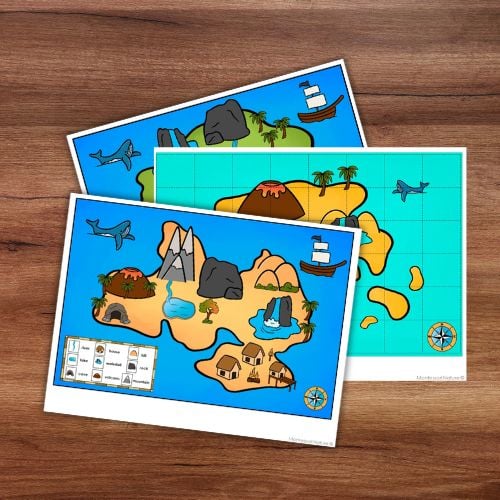
For lower elementary children, there is a second set. Three different islands printed across four pages each. The child places magnetic mountain ranges, rivers, and lakes onto each island. Then they add labels. Then they choose one island, draw it, label it, and name it.
This Build an Island activity is a direct bridge to the Imaginary Island lesson. Children learn to see an island as a complete geographical system before they are asked to invent one from nothing. When they finally sit down for the Imaginary Island lesson, they already know how to place features logically, how to label correctly, and how to create a legend. The printable has taught all of those component skills.
Using This Build an Island Activity as an End of Year Hands-On Assessment
This Build an Island printable also serves as an excellent end of the year hands on assessment for land and water forms. No written test is required. The child demonstrates their knowledge through their hands.


Build an Island Puzzle and Follow-Up Work
Reinforce land and water forms with this Build an Island puzzle, great as an end of the year hands on assessment or a focused follow-up for land and water forms work. This resource bridges concrete geography materials and the more abstract Imaginary Island lesson. Children build a color puzzle directly onto a black-and-white control sheet, then add labels for each geographical feature. A graph paper worksheet invites students to draw their own labeled island and legend.
This printable is also available on TPT
You Might Also Enjoy


About Anastasia | Anastasia is a certified early childhood teacher with over twenty years of experience in Montessori classrooms and homeschooling. As the founder of Montessori Nature, she creates evidence-based, nature-inspired educational printables. Discover more resources on her blog and Teachers Pay Teachers store.