You are invited to download the earthworm pack – learning printables for preschool and kindergarten children. Use this resource with clear true-to-life images and photographs to create hands-on science activities for your students. Children will learn the stages of the earthworm life cycle, and parts of an earthworm, practice sequencing skills and work to improve their concentration and fine motor skills. This resource will come in handy when exploring invertebrate animals, gardening, and recycling.

About earthworms
Earthworms! Children get so captivated by those creatures. Worm farms are quickly gaining popularity in early childhood classrooms. Children learn so much from observing how slowly worms transform our veggie and fruit scraps into rich soil, or as we often call it “black gold”.
Earthworms are fascinating creatures that belong to the phylum Annelida. Their body is divided into segments, each with its own set of muscles, nerves, and organs. The front part of an earthworm is called the head, which contains the mouth and sense organs. The middle part is known as the gizzard, where the food is ground up before entering the intestines. The rear segment, or tail, contains the anus and reproductive organs. Earthworms also have a slimy mucus layer that helps them move through the soil, and they breathe through their skin.
Earworms are important for the soil because they can help create healthy soil. They burrow through the dirt and eat organic matter, breaking it down into nutrients that plants can use.
Earthworms also help to aerate the soil, which means they make tiny tunnels that allow air, water, and nutrients to penetrate deeper into the soil. Therefore, earthworms play a vital role in maintaining healthy soil that supports the growth of plants and crops. This process is called decomposing, and it helps to make the soil fertile. When soil is fertile, plants can grow better and produce more food.
Did you know that there are over 6,000 species of earthworms around the world? Some of them can even grow up to 10 feet long!
building earthworm farm with children
Getting a worm farm is definitely on our list. We found a local worm breeder who also makes his own worm farms. And we also went with my daughter to a worm farm seminar. So we feel well prepared and the children can’t wait to get started!
Composting with earthworms is a great way to create nutrient-rich soil for your garden. It’s a simple process that involves adding food scraps, paper, and other organic materials to a container where earthworms can thrive.
The worms eat the organic matter and their waste, or castings, create a nutrient-rich compost that can be used to fertilize plants. This method of composting is also known as vermicomposting and is a great way to reduce waste while improving the quality of your soil. It’s a win-win for both you and your garden!
Building an earthworm farm with kids is a fun and educational project that teaches them about the importance of composting and how earthworms contribute to soil health. All you need is a large plastic container, some shredded newspaper, organic soil, and redworms. To start, add a layer of shredded newspaper to the bottom of the container, then add a layer of soil and some redworms. Repeat the layers until you’ve filled the container.
Place the container in a cool, dark place and add food scraps regularly. The redworms will eat the scraps and produce nutrient-rich worm castings that you can use as fertilizer for your garden. Kids will love watching the worms at work!
Here are the steps:
- Find a suitable container. A plastic bin with a lid or a wooden box with a mesh bottom works well.
- Drill holes in the container for ventilation and drainage.
- Add a layer of soil or coco coir at the bottom of the container.
- Add compostable materials, like fruit and vegetable scraps, coffee grounds, and shredded paper.
- Add earthworms. Red wigglers are the best for nutrient-rich vermicomposting.
- Cover the top with a layer of damp newspaper or cloth.
- Store the container in a cool, dark place and feed the earthworms once a week.
- Use the worm castings or “vermicompost” to fertilize your plants.
Earthworm hands-on activities
To create a preschool earthworm unit, start by introducing what earthworms are and their importance in the ecosystem. Show pictures and videos to grab the students’ attention. Then, have a hands-on activity where each child can hold an earthworm (encouraging them to wash their hands afterward). Next, set up a worm compost bin for the classroom and have the children observe the worms throughout the unit. Other activities could include creating worm art, reading worm-based books, and even making worm habitats. Incorporating an earthworm unit into the classroom provides an engaging opportunity for young students to learn about living things and the environment.
Earthworm activities for kids can be a fun and educational way to learn about these important creatures:
Worm Anatomy Lesson: Kids can learn about the different parts of a worm and their functions.
Observing Worm Behavior: Kids can observe worms in their natural habitat and record their behavior.
Worm Composting: Kids can learn about the benefits of worm composting and create their own worm compost bin.
Worm Races: Kids can race worms to determine which ones are the fastest.
Worm Art: Kids can use worms to create artwork by using them as “paintbrushes”.
Worm Habitat Building: Kids can design and build a habitat for worms, using materials such as soil, twigs, and leaves.
Worm Life Cycle Lesson: Kids can learn about the different stages of a worm’s life cycle and observe them firsthand.
Worm Dissection: Kids can dissect worms to learn more about their anatomy and their role in the ecosystem.
Worm Maze: Kids can create a maze for worms to explore, using materials such as cardboard, twigs, and leaves.
Worm Investigation: Kids can investigate how different substances affect worms, such as sugar water, salt water, and vinegar.
One activity is to create worm art by using earthworms to create patterns on paper with non-toxic paint. One fun activity for preschoolers is creating earthworm crafts. Using materials such as construction paper, pipe cleaners, and paint, kids can make their own little earthworms.
To make little earthworms with construction paper, pipe cleaners, and paint, follow these steps:
Cut a long, thin strip of brown construction paper and roll it up tightly to create the worm’s body. Secure with glue or tape.
Cut a shorter strip of pink or red construction paper and roll it up in the same way to create the worm’s head. Glue or tape it to the top of the body.
Cut a small piece of pipe cleaner and bend it into a U-shape to create the worm’s antennae. Glue or tape to the top of the head.
Use black paint or a marker to draw eyes and a small mouth on the head.
Use white or light-colored paint to add highlights and shading to the worm’s body for a more realistic look.
Let the paint dry completely before handling or displaying your little earthworms.
They can also create their own garden scenery to place the earthworms in. This activity encourages creativity and teaches children about the important role earthworms play in the ecosystem.
how to make your own Earthworm garden scenery with kids
Choose a location for your garden scenery – a patch of land or a planter box.
Fill the bottom of the container or patch with a layer of soil.
Add rocks, small figurines, or other decorations to create an interesting landscape for your garden.
Add more soil on top to create hills and valleys.
Water the soil lightly.
Dig small holes in the soil for each earthworm.
Place the earthworms in the holes and cover them up with soil.
Let the garden scenery sit for a few days, watering it lightly as needed.
Watch as the earthworms help to aerate the soil and create a healthy environment for plants to grow.
Additionally, it can help children develop fine motor skills such as cutting and pasting. Overall, earthworm crafts are a great way to engage kids in learning about and appreciating nature. Kids can also learn about the earthworm life cycle by observing and tracking the different stages of development. These activities can help children understand the important role earthworms play in our ecosystem. Without earthworms, the ecosystem would be missing an important component, and plants and other animals would struggle to survive. Therefore, it’s vital to keep our environment healthy for earthworms and all living things.

The life cycle of earthworms is truly fascinating. It all starts with the hatching of tiny eggs, which then develop into small worms known as juveniles. As they grow, they shed their skin multiple times and continue to eat their way through the soil, helping to break down organic matter.
Eventually, they reach maturity and become fully grown adults. During the breeding season, they come to the surface to mate and lay their eggs, starting the cycle all over again. It’s amazing how these small creatures can have such a big impact on the health of our soil and ecosystems.
I also recommend checking earthworm resources with earthworm life cycle figures that complement this printable.
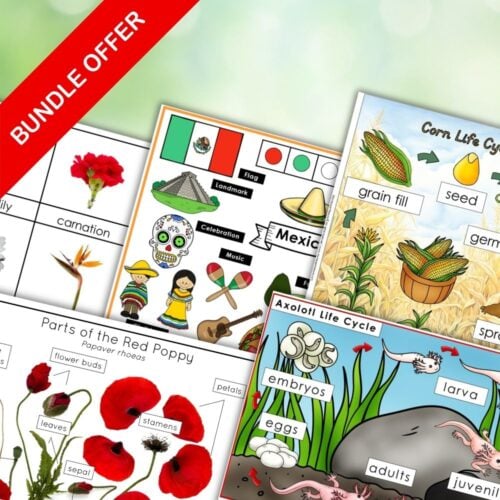
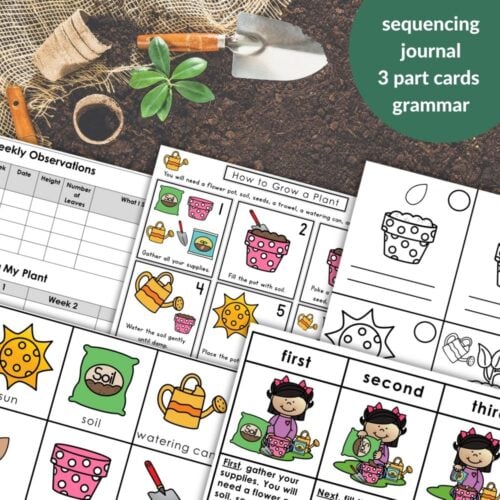
Here is what’s included
- Earthworm life cycle poster
- Earthworm life cycle 3 part cards
- Earthworm life cycle coloring, cutting, and pasting worksheet (color and blackline)
- Earthworm life cycle tracing strips
- Earthworm life cycle information cards
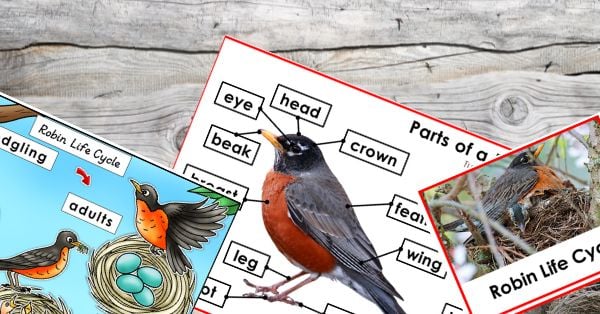
- Parts of the Earthworm poster
- Parts of the Earthworm information cards
- Parts of the Earthworm student activity page
- Parts of the Earthworm labels
- Parts of the Earthworm tracing & independent writing worksheet
- Parts of the Earthworm student booklet (independent writing)
Age: Preschool ages 3 – 6 years
Subjects and uses in the classroom: Nature Table, Science Centers, Fine motor, Prewriting, Earth Day Unit, Recycling
How to use this resource:
Parts of the Earthworm – Gather books about worms for children to explore. Print posters and label cards on cardstock and laminate. Cut individual label cards. Attach clear velcro to the poster without labels and label cards.
Present the poster – name all parts and invite the students to share their thoughts on the various functions of each part and make their own research. Then read each label and invite the student to match it to the corresponding part of the earthworm’s body.
Life cycle poster – print on cardstock and laminate. Present all stages of the earthworm life cycle. Invite the children to retell them or tell their own story that features all the stages.
get the LIFE CYCLE toy figurines here
Earthworm life cycle 3-part cards – Print on cardstock and laminate if you wish to preserve colors and card quality for future use. Place picture cards in a column and invite the children to match the picture to the picture and the word to the word. Present control cards and invite the child to lay the stages of the cycle in the correct order.
Earthworm life cycle line art – supply scissors, glue, and coloring pencils. Invite the student to color and cut cards and glue them into the correct sequence.
Earthworm tracing/labeling and coloring worksheets – print on cardstock and laminate. Supply an erasable pen. Invite the child to trace the words and color corresponding images. Alternatively, print pages on regular printing paper and invite the child to trace or label the stages of the earthworm life cycle.
You might like to invite the students to compare the life cycle of an earthworm with other invertebrate animals.
You may have noticed that some of my life cycle and diagram printables have a bit of a history around here. In the early days of this site, these resources were offered as freebies—a way to share what I was creating as I found my footing. Over time, though, I’ve continued to revisit them, adding more detail, expanding the content, and refining the design to make them as useful as possible for you and your little ones.
What started as a simple printable has now grown into a full collection, and after all those updates and extensions, these resources are now available in my shop for a small fee. This allows me to continue dedicating time to improving what I offer—alongside the hundreds of pages of free printables you’ll still find here. My goal has always been to create resources that truly serve you, whether free or paid, and to keep this space growing for our community.
So if you’ve been following along since the early days, thank you for being here. And if you’re just discovering these printables now, I’m so glad you found them. Either way, I hope this collection brings you and your children as much joy to use as it brought me to create.
resources you might find helpful in your classroom
-
 Invertebrates: Preschool Kindergarten Activities$12.00
 -
April BundlePrice range: $2.00 through $6.20
-
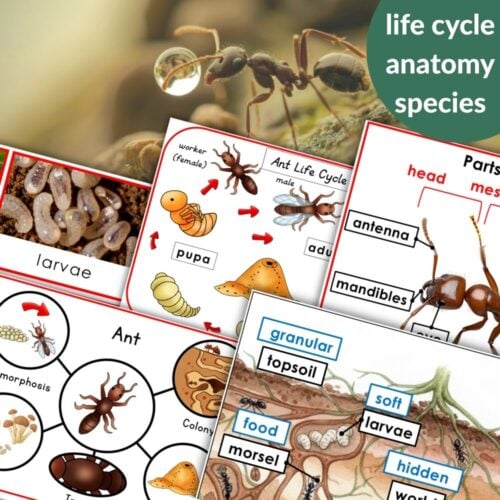
Ant Life Cycle and Anatomy Activities$8.00
-
May BundlePrice range: $3.00 through $8.00
-
How to Wash a Car Spring and Summer Chores$3.50
-
How to Grow a Plant Spring Summer Gardening$3.80


About Anastasia | Anastasia is a certified early childhood teacher with over twenty years of experience in Montessori classrooms and homeschooling. As the founder of Montessori Nature, she creates evidence-based, nature-inspired educational printables. Discover more resources on her blog and Teachers Pay Teachers store.